Bathroom Fan Motor Replacement Guide
When dealing with bathroom fan motor replacement, the process of taking out a faulty motor and fitting a new one to restore proper air extraction in a bathroom. Also known as bathroom exhaust fan motor swap, it’s a task that blends basic electrical work with simple mechanical steps.
Why the Motor Matters for Your Bathroom’s Air Quality
The motor is the heart of any extractor fan, a device that pulls humid air out of a bathroom and pushes it to the outside. When the motor falters, moisture builds up, leading to mold, slippery floors, and an unpleasant smell. In short, bathroom fan motor replacement directly improves ventilation efficiency, prevents structural damage, and keeps the space comfortable.
Most bathroom fans belong to a larger ventilation system, the network of ducts, vents, and fans that manage indoor air quality in homes and commercial buildings. If the motor fails, the whole system loses its capacity to move air, so fixing it restores balance across the entire network.
The motor itself is a compact electric motor, a rotating device that converts electrical energy into mechanical motion to spin the fan blades. Typical specs include horsepower (often 1/35 to 1/30 hp), voltage (120 V in the UK), and a lifespan of 5‑10 years with regular use. Knowing these specs helps you choose a replacement that matches the fan’s size and airflow rating.
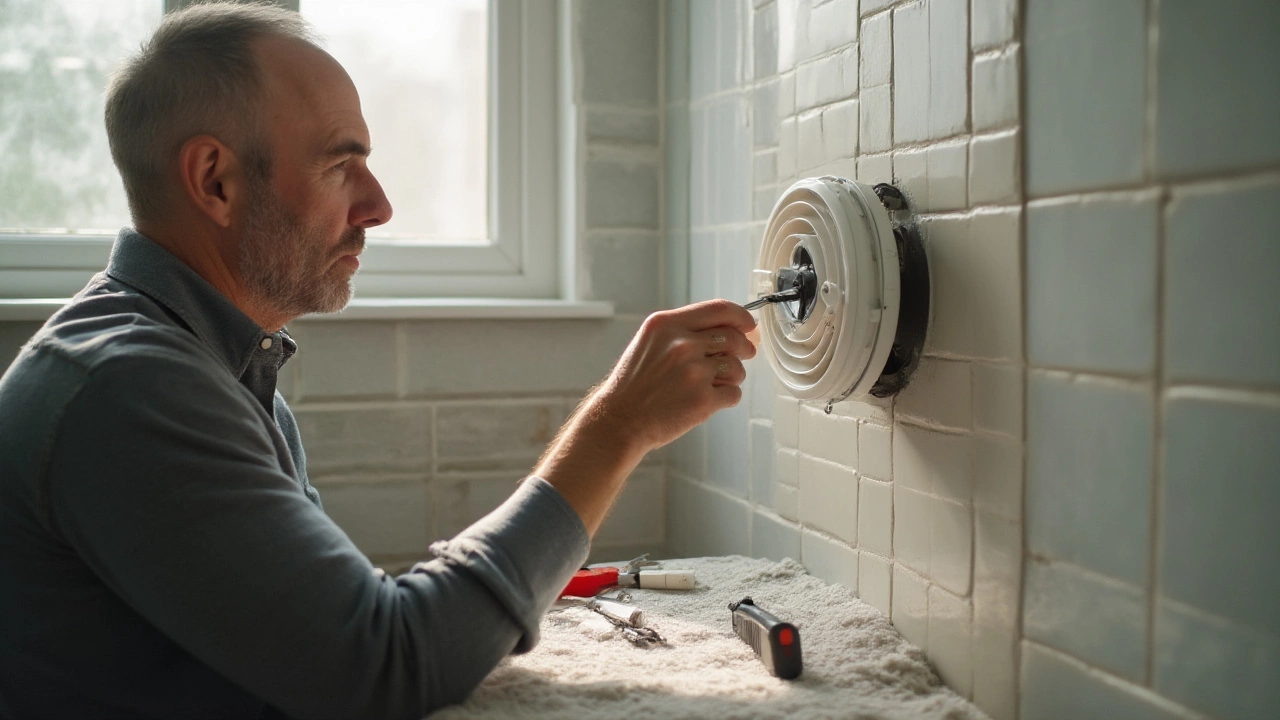
Before you grab a screwdriver, consider the tools and safety gear you’ll need. A basic appliance repair kit should contain a Phillips and flathead screwdriver, a utility knife, wire cutters, a multimeter, and a flashlight. If you’re not comfortable handling live wires, hiring a certified technician is the safest route. Professional appliance repair, service that diagnoses and fixes faulty household and commercial devices can also guarantee that the new motor meets local electrical codes.
The replacement steps follow a logical sequence: first, turn off the circuit breaker and remove the fan’s cover; second, disconnect the old motor’s wiring using the multimeter to confirm zero voltage; third, detach the motor from its mounting brackets; fourth, fit the new motor, reconnect the wires according to the manufacturer’s diagram, and secure the brackets; finally, reassemble the cover and test the fan by restoring power.
After the motor is up and running, a quick maintenance routine extends its life. Clean the fan blades and intake grille monthly, check the wiring for signs of wear annually, and listen for abnormal noises that could signal bearing trouble. If you notice reduced airflow, inspect the ductwork for blockages before assuming the motor is at fault again.
Now that you understand the key parts, tools, and safety steps, you’re ready to dive into the specific articles below. They break down each stage in detail, compare DIY vs. professional options, and give you cost estimates so you can decide the best path for your bathroom’s ventilation health.
Extractor Fan Motor Replacement: How to Change Your Bathroom or Kitchen Fan Motor
Replacing the motor in an extractor fan takes the right knowledge, simple tools, and a bit of patience. Learn if you can do it, how to spot common issues, and detailed steps so your fan runs like new.