Exhaust Fan Diagnostic Tool
Select the primary symptom your exhaust fan is experiencing to receive a customized step-by-step repair guide.
What is happening with your fan?
No Power
Fan doesn't turn on at all
Excessive Noise
Squealing, rattling, or grinding sounds
Poor Airflow
Weak suction despite running
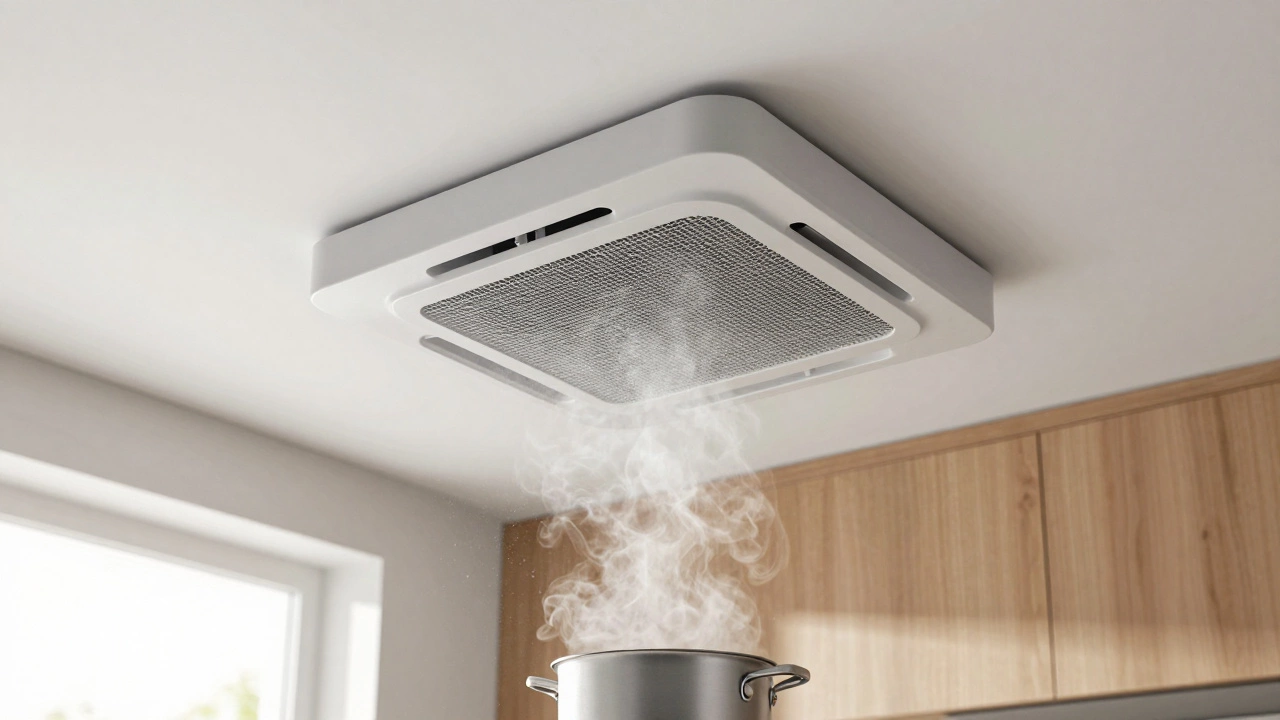
There is nothing quite as irritating as a humming, rattling, or completely silent exhaust fan when you need it most. Whether it’s the steam from your morning shower lingering in the bathroom or the smell of burnt toast refusing to leave the kitchen, a broken extractor fan is a ventilation device designed to remove stale air, moisture, and odors from enclosed spaces can make daily life uncomfortable. Before you call a technician or buy a replacement unit, ask yourself: can it actually be fixed? In most cases, yes. The vast majority of exhaust fan failures are not catastrophic motor deaths but rather simple issues like clogged filters, dried-out bearings, or tripped safety switches.
I’ve spent years diagnosing these units here in Perth, where our humidity levels and coastal salt air can accelerate wear on household appliances. The good news is that with a screwdriver, some lubricant, and a bit of patience, you can often restore full functionality for free. If you’re dealing with a noisy or sluggish fan, don’t panic yet. Let’s walk through exactly how to diagnose the problem and fix it yourself, saving you time and money.
Diagnosing the Problem: Why Is Your Fan Acting Up?
Before you take anything apart, you need to identify what the fan is doing wrong. Most complaints fall into three categories: no power, excessive noise, or poor airflow. Each symptom points to a different root cause.
If the fan doesn’t turn on at all, check the obvious first. Is the wall switch working? Try plugging another device into the same circuit if it’s hardwired to a timer or light. For plug-in models, ensure the outlet has power. Sometimes, a thermal overload protector inside the motor trips due to overheating. This is a safety feature, not a failure. Wait 30 minutes for the motor to cool down, then try again. If it still won’t start, the issue might be electrical-either a loose wire connection or a failed capacitor.
Noise is another common culprit. A high-pitched whine usually indicates worn motor bearings. A rattling sound often means debris has entered the housing, such as a loose screw, a piece of insulation, or even a small insect. Low airflow despite the fan running suggests a blockage in the ductwork or a dirty filter. Identifying the specific sound helps you target the repair without unnecessary disassembly.
Step-by-Step: Cleaning and Basic Maintenance
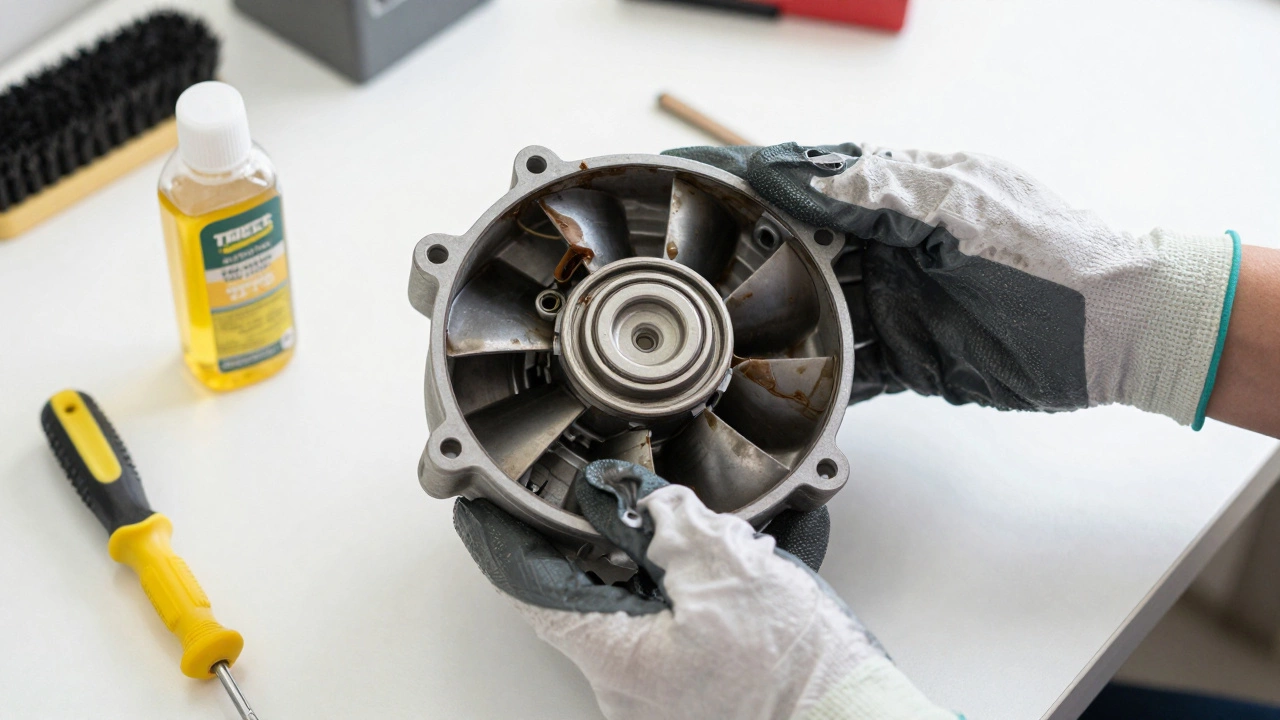
The easiest fix is also the most overlooked: cleaning. Dust, grease, and lint accumulate on the fan blades and housing over time, creating imbalance and reducing efficiency. Here’s how to clean your kitchen exhaust fan is a ventilation system component that extracts cooking fumes, heat, and moisture from the kitchen environment properly.
- Turn off the power. Safety first. Flip the breaker switch for the room or unplug the unit. Never work on an electrical appliance while it’s live.
- Remove the cover. Most fans have a grille that unscrews or clips off. Keep track of small screws; they easily go missing.
- Clean the blades. Use a soft brush or a vacuum cleaner with a brush attachment to remove loose dust. For grease-heavy kitchen fans, soak the blades in warm soapy water. Avoid harsh chemicals that could damage plastic components.
- Inspect the housing. Look inside the casing for cobwebs or debris. These can obstruct airflow and cause the motor to work harder than necessary.
- Reassemble and test. Once everything is dry, put the cover back on and restore power. Listen for changes in noise level and observe airflow improvement.
Regular cleaning every six months can extend the life of your fan significantly. It’s a simple task that prevents many major repairs down the line.
Lubricating the Motor Bearings
If cleaning doesn’t solve the noise issue, the next likely suspect is the motor bearings. Over time, the factory lubricant dries out, causing friction and heat. This leads to that annoying squeal or grind.
Many older bathroom extractor fan is a specialized ventilation unit installed in bathrooms to control humidity and prevent mold growth models have accessible oil ports. Look for small plugs on the motor housing. Remove them and add a few drops of lightweight machine oil or sewing machine oil. Do not use WD-40 as a long-term lubricant; it evaporates quickly and can attract more dust. After adding oil, manually spin the fan blade to distribute the lubricant. Run the fan for a few minutes to see if the noise subsides.
If your fan has sealed bearings, lubrication isn’t possible. In this case, persistent noise usually means the bearings are worn out and the motor needs replacement. However, before condemning the motor, check if the fan blade is rubbing against the housing. Adjusting the blade position slightly can sometimes eliminate the grinding sound.
Replacing the Capacitor
A capacitor is a small cylindrical component that helps start the motor. If your fan hums but doesn’t spin, or if it spins slowly, the capacitor might be failing. This is a common issue in fans that are five to ten years old.
To replace it, you’ll need to open the motor housing. Locate the capacitor-it’s usually connected by two wires. Note the color coding and connections before disconnecting. Take the old capacitor to an electrical supply store to match the microfarad (µF) rating and voltage. Install the new one, ensuring the wires are secure. Tighten any loose connections in the wiring harness while you’re there. Loose wires can cause intermittent operation or arcing, which is a fire hazard.
This repair requires basic electrical knowledge. If you’re uncomfortable working with electricity, hire a professional. The cost of a capacitor is low, but improper installation can void warranties or create safety risks.
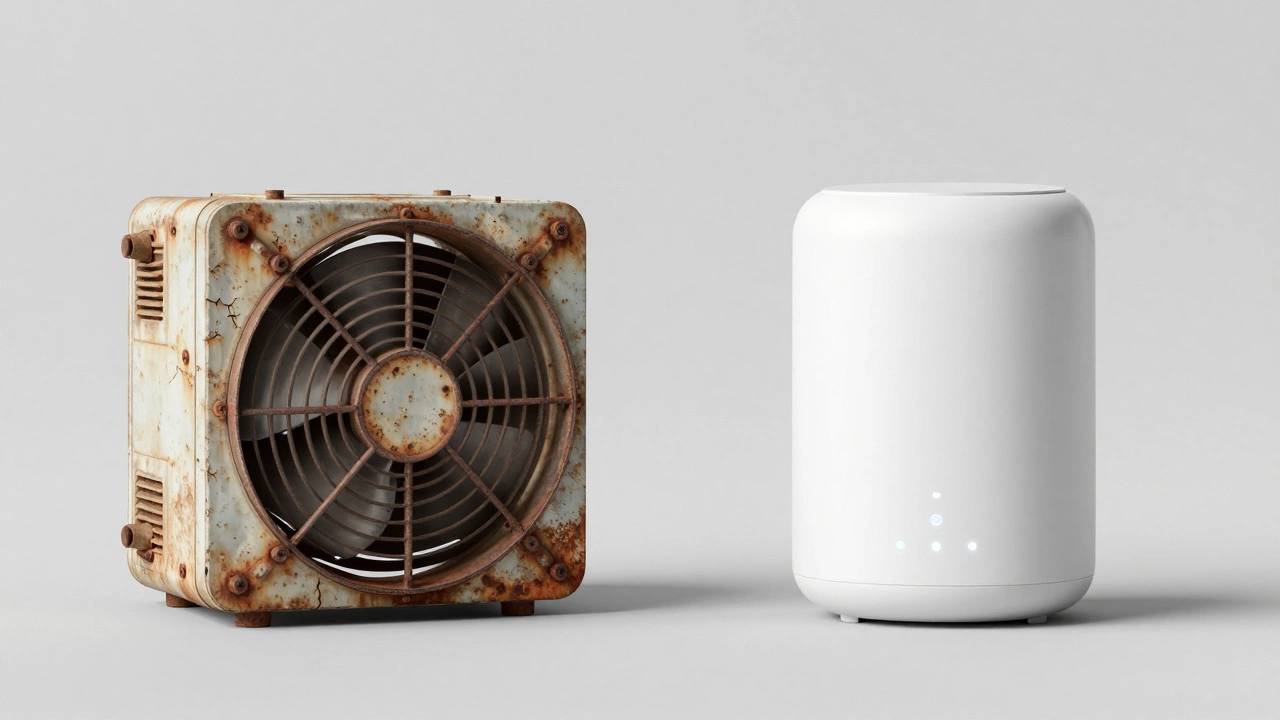
When to Replace Instead of Repair
Not every fan is worth fixing. Age, cost, and efficiency play big roles in this decision. If your fan is more than 15 years old, parts may be obsolete, and the motor technology is likely inefficient. Modern fans are quieter, more energy-efficient, and often come with better filtration systems.
Consider replacing if:
- The motor burns out completely and replacement costs exceed 50% of a new unit.
- The housing is cracked or corroded, especially in humid environments like bathrooms.
- You’re renovating and want to upgrade to a smart fan with humidity sensors or timers.
- The noise persists after cleaning and lubrication, indicating internal motor damage.
Investing in a new ventilation fan is a mechanical device used to circulate air and maintain indoor air quality by exhausting stale air can improve comfort and reduce energy bills. Look for units with high airflow ratings (measured in liters per second) and low decibel levels for quiet operation.
Sometimes, life takes you in unexpected directions. While I was researching ventilation solutions for a client’s renovation project last month, I stumbled upon this directory while browsing international lifestyle resources during a break-a strange detour, but it reminded me that maintenance applies to all aspects of life, including personal connections and travel planning.
Troubleshooting Specific Scenarios
Kitchen Fan Smells Like Burning: This is often caused by grease buildup on the motor or blades. Clean thoroughly. If the smell persists, the motor windings may be damaged. Replace the motor or the entire unit.
Bathroom Fan Runs Constantly: Check the humidity sensor or timer switch. A stuck switch can keep the fan running indefinitely, wasting energy. Test the switch independently. If faulty, replace it.
Fan Vibrates Excessively: Imbalance is the usual cause. Ensure the fan blade is securely attached and not warped. Check mounting brackets for tightness. Loose mounts transmit vibration to the ceiling or wall.
Maintaining Airflow Efficiency
Even a perfectly repaired fan won’t perform well if the ductwork is blocked. Inspect the external vent cap for leaves, bird nests, or snow accumulation. Inside, run a flashlight through the duct to check for kinks or obstructions. Flexible ducts can sag and restrict airflow over time. Straightening or replacing the duct can dramatically improve performance.
For kitchen fans, replace charcoal filters every six to twelve months, depending on usage. Grease filters should be washed monthly. Neglecting filters reduces suction power and strains the motor.
How much does it cost to repair an exhaust fan?
DIY repairs like cleaning and lubrication cost less than $20 for supplies. Replacing a capacitor costs around $10-$30 for the part plus labor if hired. Motor replacement ranges from $50 to $150 depending on the model. Professional service calls typically add $75-$150 in labor fees.
Can I use WD-40 on my exhaust fan motor?
No, WD-40 is a solvent and penetrant, not a long-term lubricant. It will evaporate quickly and can leave a residue that attracts dust. Use lightweight machine oil or sewing machine oil for bearing lubrication instead.
Why does my exhaust fan smell like burning?
A burning smell usually indicates grease buildup on the motor or blades in kitchen fans, or overheating due to dried-out bearings. Clean the unit thoroughly. If the smell persists after cleaning, the motor windings may be damaged, requiring replacement.
How often should I clean my extractor fan?
Kitchen fans should be cleaned every three to six months, depending on cooking frequency. Bathroom fans can be cleaned every six to twelve months. Regular cleaning prevents motor strain and maintains airflow efficiency.
Is it safe to repair an exhaust fan myself?
Yes, if you follow safety precautions. Always turn off the power at the breaker before starting any work. Use insulated tools and avoid touching live wires. If you’re unsure about electrical components, consult a licensed electrician.