Electric Oven Heating Problem Diagnostic
Recommended Diagnosis
Did you know that nearly one‑third of kitchen complaints about electric ovens trace back to a single issue? That problem is the oven simply refusing to heat. If you’ve ever opened the door to a cold interior while the timer ticks away, you’re not alone.
Key Takeaways
- Most heating failures stem from a faulty heating element, thermostat, or control board.
- Visible signs like uneven browning or no heat at all help pinpoint the culprit.
- A simple visual inspection can save you a service call in many cases.
- When in doubt, safety first - unplug the appliance before troubleshooting.
- Regular maintenance, such as cleaning the door seal, prolongs oven life.
How an Electric Oven is a kitchen appliance that uses electricity to generate heat for baking, roasting, and broiling works
Inside every electric oven sits a set of components that work together to reach and hold the temperature you set. The power comes from the home’s electrical circuit, passes through a fuse or circuit breaker, and then reaches the control board. The board interprets your temperature selection and activates the heating elements. A thermostat or temperature sensor constantly measures the cavity temperature and signals the board to turn the heat on or off. Finally, the door seal keeps the hot air inside, ensuring energy efficiency.
Why Your Oven Might Not Heat
When any link in that chain fails, the oven can appear dead. Below are the most frequent offenders.
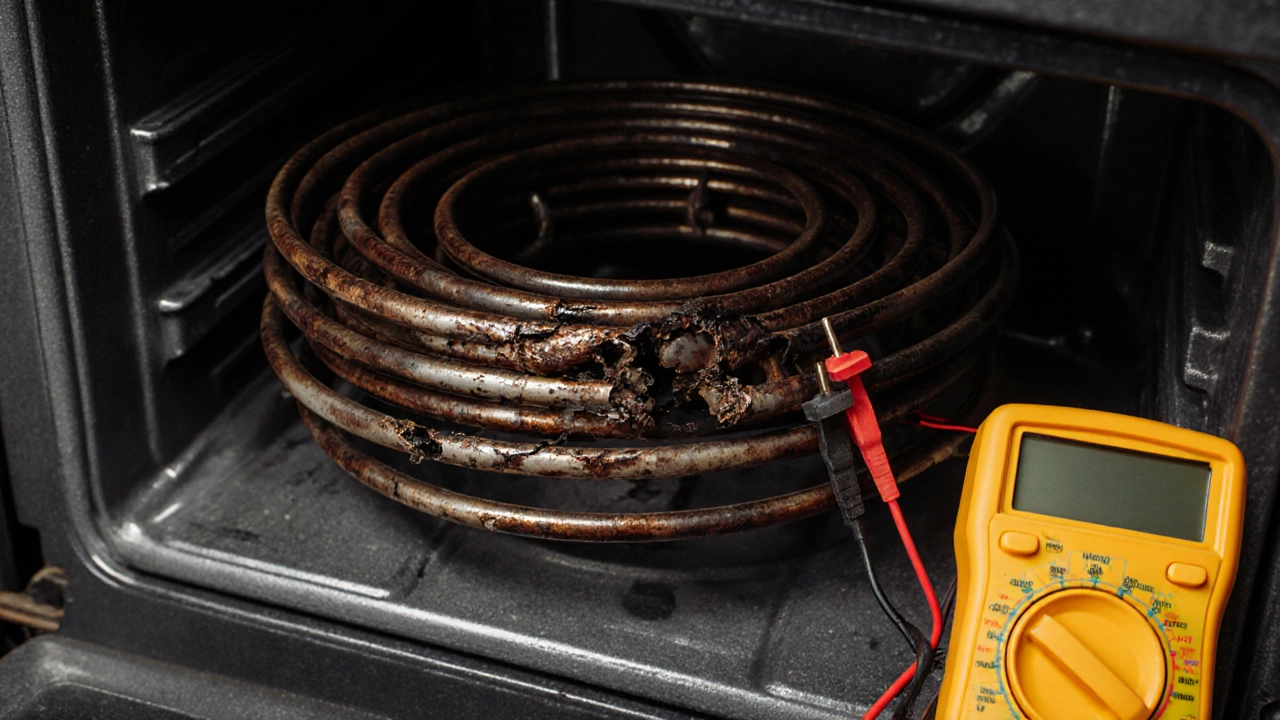
1. Heating Element is a metal coil that converts electrical energy into radiant heat inside the oven cavity burnout
The heating element is the heart of the oven’s heat‑generation. Over time, repeated heating cycles cause the coil to develop cracks or breakages. A visual inspection often reveals a blistered or broken coil. If the element is faulty, the oven will stay cold even though the control board is trying to power it.
2. Thermostat is a device that regulates oven temperature by opening or closing an electrical circuit or temperature sensor failure
Modern ovens use a thermistor or digital sensor instead of a mechanical thermostat. When the sensor reads an incorrect temperature, it can tell the control board that the oven is already hot, shutting off the heating element before it ever turns on. A quick test is to set the oven to a low temperature (e.g., 150°C) and see if the element lights up; if it does, the sensor is likely at fault.
3. Control Board is the electronic circuit board that processes user input and controls heating elements, fans, and safety features malfunction
The control board is the oven’s brain. Power surges, moisture, or simply age can cause its components to fail. Symptoms include the oven displaying error codes, lights flashing, or the heating element never receiving power despite the thermostat calling for heat.
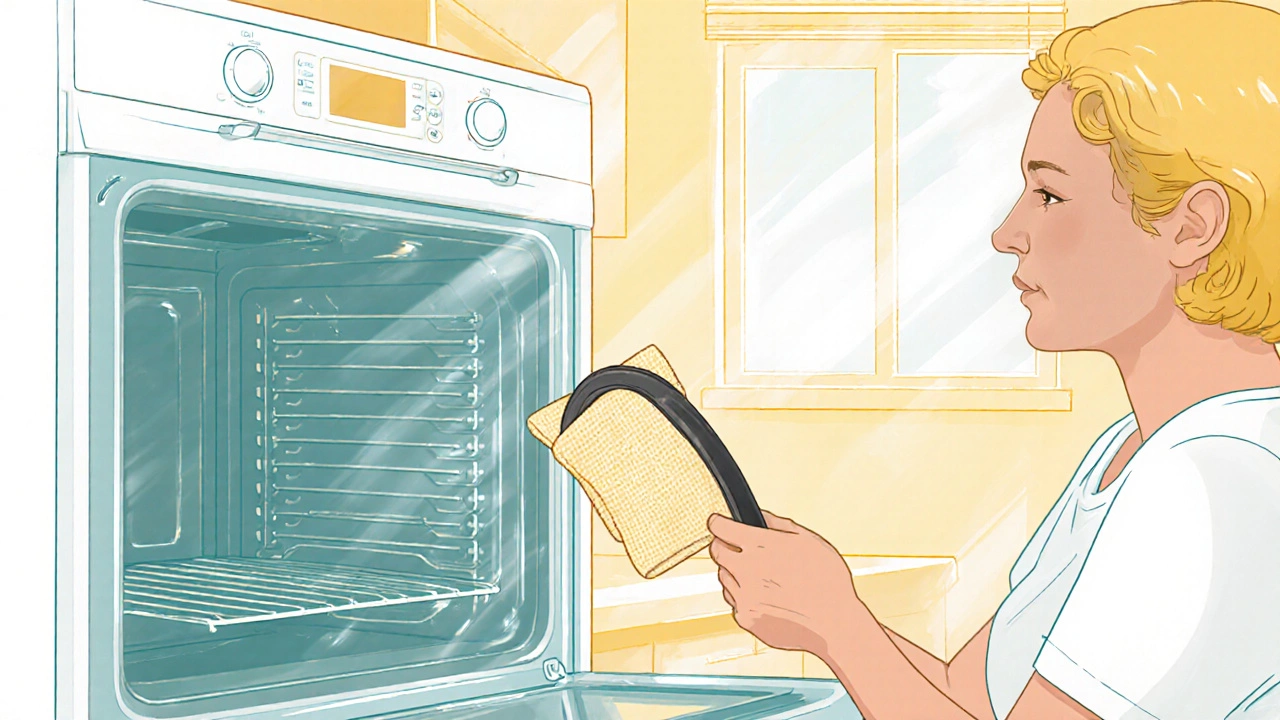
4. Door Seal (Gasket) leaks
A cracked or warped door seal lets hot air escape, making it seem like the oven won’t get hot enough. You’ll notice temperature fluctuations, longer preheat times, and uneven baking results. Inspect the seal for tears or gaps; replace it if you see any damage.
5. Blown Fuse is a safety device that interrupts electrical flow when current exceeds safe limits or tripped circuit breaker
Some ovens have an internal fuse that protects the heating element. If the element draws too much current, the fuse blows, cutting power instantly. Check the oven’s manual for fuse location; a visual inspection can reveal a broken filament.
6. Power Supply problems
Electric ovens typically require a dedicated 240‑V circuit. A loose plug, damaged cord, or a breaker that won’t stay on can prevent the oven from receiving enough power. Verify the outlet with a multimeter and make sure the breaker is fully engaged.
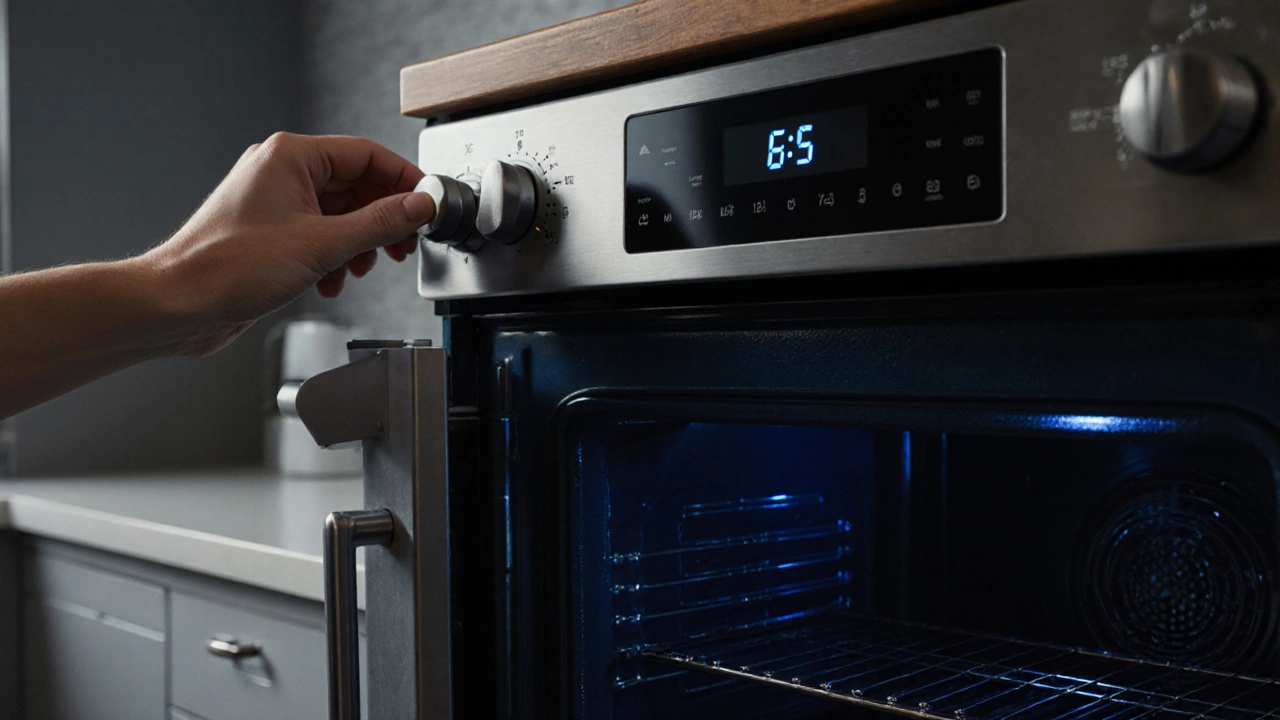
Diagnosing the Issue: A Step‑by‑Step Checklist
- Unplug the oven or turn off the breaker - safety first.
- Visually inspect the heating element for breaks or discoloration.
- Check the door seal for cracks; replace if needed.
- Locate the internal fuse (usually near the back panel) and look for a broken filament.
- Use a multimeter to test continuity on the heating element, thermostat, and fuse.
- If the oven powers on but the element stays cold, the control board or temperature sensor is likely at fault.
- Restore power and run a quick heat test (set to 200°C for 5 minutes). Observe whether the element glows.
Document each step; it helps a technician if you eventually need professional assistance.
Common Symptom vs. Likely Cause vs. Fix
| Symptom | Likely Cause | Suggested Fix |
|---|---|---|
| No heat at any temperature | Burned heating element or blown fuse | Replace element or fuse; verify power supply |
| Oven takes twice as long to preheat | Leaking door seal or weak element | Replace seal; test element resistance |
| Uneven browning | Faulty thermostat/sensor | Swap sensor; recalibrate control board |
| Intermittent heating (on/off cycles) | Control board glitches | Inspect board for burnt traces; replace if needed |
| Error code on display | Sensor failure or board error | Consult manual; replace indicated component |
When to Call a Professional
If you’ve run the checklist and the oven still won’t heat, it’s time to enlist a qualified appliance technician. Common red flags that require expert help include:
- Repeated tripping of the circuit breaker.
- Burnt smells or visible sparks from the control board.
- Complex electronic diagnostics beyond a multimeter’s scope.
- Warranty still active - attempting a DIY repair could void it.
Professional repair ensures that the high‑voltage components are handled safely and that the oven passes any required electrical codes.
Preventive Maintenance Tips
Regular care reduces the chance of heating failures:
- Wipe the interior after each use to prevent residue buildup on the element.
- Inspect the door gasket quarterly; clean with mild soap and replace if brittle.
- Run a self‑clean cycle (if available) every 3-4 months to burn off food particles.
- Check the power cord for fraying; replace any damaged sections promptly.
- Schedule an annual service check for older ovens, especially if they’re over 10years old.
These simple steps keep the oven’s temperature sensors accurate and the heating element in good shape.
Quick Reference Cheat Sheet
- Check element - visual break = replace.
- Test fuse - broken filament = replace.
- Inspect door seal - gaps = replace gasket.
- Measure resistance of thermostat/sensor - out of spec = swap.
- If all hardware checks out, suspect control board - professional diagnosis.
Frequently Asked Questions
Why does my electric oven heat up slowly?
Slow preheat usually points to a weakened heating element or a leaking door seal. A damaged element can’t generate enough wattage, while a faulty seal lets the heat escape, forcing the oven to work harder.
Can I replace the heating element myself?
Yes, if you’re comfortable working with basic electrical components. Always disconnect power, remove the rear panel, unscrew the element, and note the wire connections before swapping in the new part.
What does an error code on my oven display mean?
Error codes vary by manufacturer but generally indicate a sensor or board fault. Consult the user manual for the specific code; it will point you to the component that needs testing or replacement.
Is it safe to use the oven if the door seal is cracked?
Using the oven with a broken seal isn’t dangerous, but it will waste energy and may lead to uneven cooking. Replace the gasket promptly to restore efficiency.
How often should I clean the heating element?
Wipe the element after each use once it’s cool. For stubborn splatters, a gentle scrub with a non‑abrasive pad works well. Avoid harsh chemicals that could corrode the coil.
electric oven problems are frustrating, but with a systematic approach you can often identify and fix the issue yourself, saving time and money. When the fix is beyond basic components, trust a certified technician to keep your kitchen safe and your meals on schedule.