In the world of kitchen appliances, gas ovens are known for their efficiency and precision. But when your oven doesn't heat up, it can be quite frustrating, often pointing to an issue with the igniter. Repairing or replacing an igniter isn't something most people do every day, so it's useful to understand what this repair might entail both in terms of effort and cost.
Before jumping onto the repair, recognizing the symptoms of a faulty igniter can save you from the inconvenience of a broken oven during crucial moments. This guide not only explains the costs involved but also provides valuable tips on whether you should consider rolling up your sleeves for a DIY fix or call in a professional. From typical expenses to preventative measures, this article aims to equip you with all the information you need to make an informed decision about your gas oven igniter.
- Signs Your Gas Oven Igniter Needs Repair
- Breakdown of Costs for Parts and Labor
- DIY Repair vs Hiring a Professional
- Tips to Prevent Future Igniter Issues
- Choosing the Right Parts and Tools
Signs Your Gas Oven Igniter Needs Repair
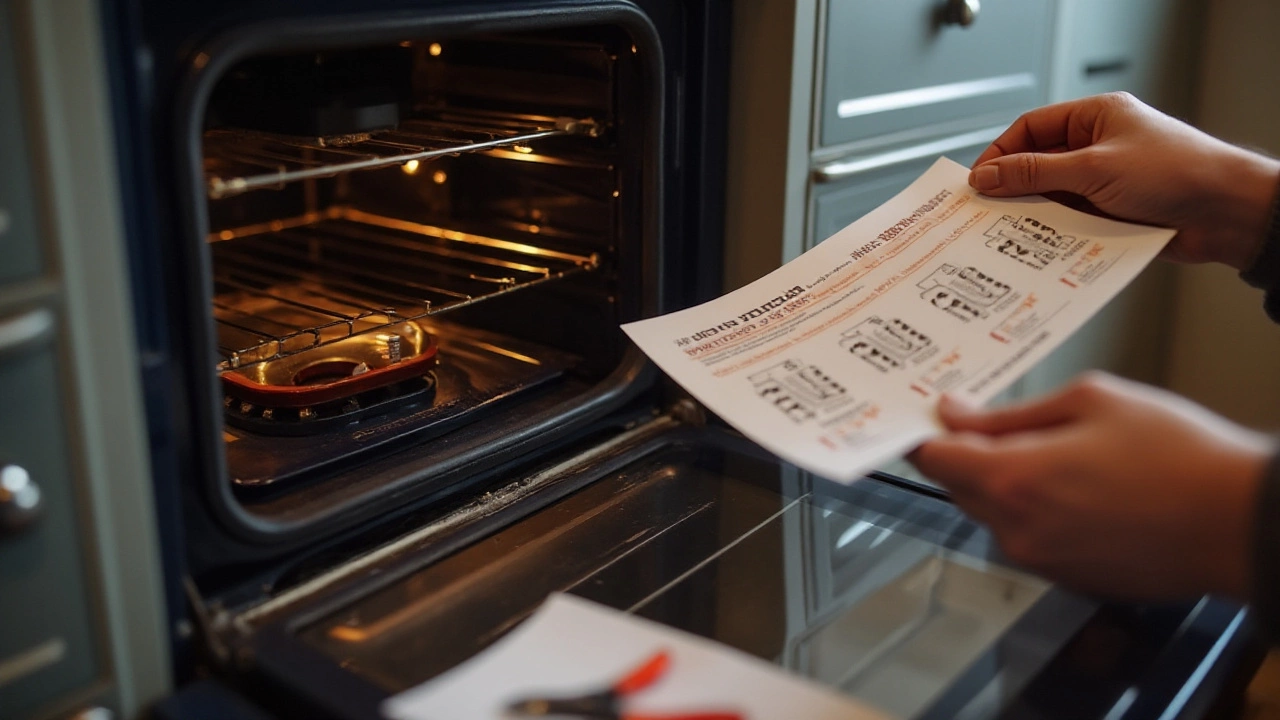
One of the first clues your gas oven might be having igniter troubles is when preheating takes considerably longer than usual. If you’ve ever set a timer to wait for that telltale beep, only to be delayed enough that your culinary plans start drifting into uncertainty, you might be dealing with a faltering igniter. It's not just a matter of patience; this delay often means the igniter is struggling to reach the necessary temperature to trigger the gas valve and ignite the flame.
A closer observation during the preheating phase can reveal crucial details. When you turn on your oven, listen for a clicking sound. This sound indicates that the igniter is attempting to light the gas, but if the clicks persist without the familiar whoosh of the gas igniting, it's a red flag. A weak or intermittent flame, or no flame at all after repeated clicking attempts, clearly indicates the igniter isn't functioning correctly.
Another sign is associated with erratic heat maintenance. Your recipes might not be turning out right, not because you missed a step, but because the oven isn’t maintaining the set temperature. Uneven cooking or partial burns on what should be perfectly baked goods often hint at igniter dysfunction, where the oven struggles to maintain a consistent temperature due to unreliable ignition.
An unfamiliar odor, especially a gas smell, is another serious indicator. While some odor might be normal when initially turning on the oven, a persistent smell can be hazardous, suggesting gas isn’t being ignited completely, or soon enough, creating a safety risk. Immediate attention is warranted when smelling gas; a faulty igniter is often to blame, and addressing it promptly can prevent potential dangers.
Serious aromas might signal not just safety risks but inefficiencies in gas usage, leading to higher energy bills - something pristine maintenance of your appliance could easily avert,” notes appliance expert Jane Richardson.
Looking through the oven door at the igniter can provide visible confirmation. The igniter should glow bright enough to light the gas; if it doesn’t glow at all, or only faintly glimmers, it’s time for a closer examination. An igniter that isn’t bright indicates it doesn’t have sufficient current to open the gas valve properly. This is a direct path to incomplete combustion, which not only affects cooking results but may produce excessive carbon monoxide.
| Warning Sign | Possible Cause |
|---|---|
| Delayed Preheating | Weak or failing igniter |
| Continuous Clicking | Igniter not lighting gas |
| Uneven Cooking | Erratic igniter temperature |
| Gas Odor | Incomplete ignition |
If you’re experiencing any of these tell-tale issues, the igniter is likely to blame. Before these seemingly minor issues grow into an expensive repair bill, being proactive in addressing the signs of a failing igniter can save a lot of hassle. As always, ensuring your oven is well maintained not only stretches its lifespan but guarantees those automotive delights continue emerging perfectly baked from your kitchen.
Breakdown of Costs for Parts and Labor
Figuring out the cost of getting your gas oven repair can feel like a daunting task, but breaking it down can make it more manageable. The primary expense comes from the igniter replacement itself, with a typical price ranging generally between $20 and $90 for the part alone. The cost can vary depending on the brand and where you purchase it from. If you're dealing with a common brand like GE or Whirlpool, parts tend to be more affordable and easily available. However, high-end models may require more specialized parts which can drive prices up.
Labor costs, on the other hand, can vary widely based on location and the professional you choose. Generally, you can expect to pay anywhere from $100 to $200 for a seasoned technician to visit your home, inspect the problem, and replace the igniter. In bustling cities, these costs might flicker towards the higher end, while rural areas might witness slightly cheaper rates. While some might hesitate at these numbers, it's crucial to consider the convenience and expertise a professional brings, often pinpointing issues beyond the obvious igniter fail.
"Repairing a gas oven igniter shouldn't drain your budget. With the right knowledge, you could save on both parts and labor," advises Daniel Cooker of Home Repair Weekly.
For those with a knack for DIY, repairing the igniter yourself is a viable option. However, weigh this decision carefully. The initial expense of purchasing necessary tools, such as a multimeter to test the igniter's functionality, must be considered. Additionally, the risk of improper repair can lead to further damage, which might increase the overall cost in the long run. Some decide to play it safe and let professionals handle these repairs because of safety concerns associated with gas appliances.
To give you a better idea of potential savings, here's a look at a typical cost breakdown, assuming both parts and professional service:
| Category | Estimated Cost |
|---|---|
| Igniter Part | $20 - $90 |
| Labor Fee | $100 - $200 |
| Total Cost | $120 - $290 |
Keep in mind that the value of a working oven, especially as the festive season approaches, often outweighs the repair cost. It’s advised to always obtain multiple quotes and consider any repair offers from your oven's manufacturer, which could include discounted rates for loyal customers. It’s also not outlandish to negotiate with repair technicians for a better deal. Mentioning competitor pricing you've seen elsewhere might just snag you a small but helpful discount.
DIY Repair vs Hiring a Professional
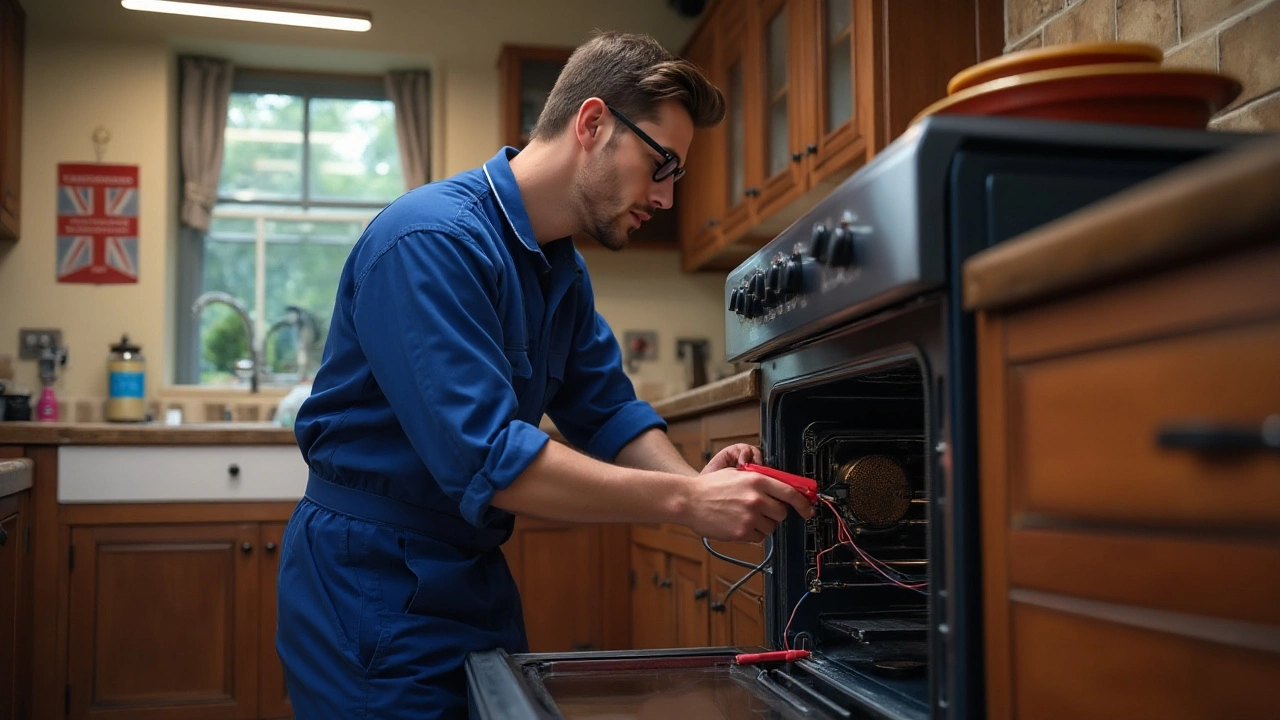
When faced with a malfunctioning gas oven igniter, the decision between rolling up your sleeves for a DIY repair or hiring a professional can be daunting. Each option comes with its own set of pros and cons. On one hand, the idea of saving money and learning to fix things on your own can be very appealing to many homeowners. Repairing the igniter yourself not only gives you a sense of achievement, but it allows for the possibility of immediate action, eliminating the need for scheduling a technician’s visit, which can take days or even weeks.
However, before taking the plunge into a DIY project, consider the technical challenges it might involve. Gas appliances can be tricky, as mishandling them might lead to further damage or even potential safety hazards. If the igniter repair involves significant disassembly of the oven, you'll need to feel comfortable navigating through its components. According to a report from the American Association of Appliance Manufacturers, malfunction due to improper repairs accounts for a significant percentage of appliance issues not reported. This statistic underlines the importance of competence before attempting such tasks.
"Balancing cost savings with safety when deciding between DIY and professional repair is crucial," says Mark Rodriguez, a seasoned appliance repair technician with over 20 years of experience.
DIY repair enthusiasts should also consider the cost and availability of parts. While sourcing parts like an igniter is generally straightforward, ensuring compatibility with your specific model can be challenging without proper knowledge. Additionally, you might need specialized tools. The initial outlay for these can offset the savings you'd make by not hiring a professional. On the other hand, professional repair services can often access parts at a better rate due to bulk purchasing agreements with suppliers.
Cost Considerations
The financial aspect of repairing or replacing a gas oven igniter is undeniably influential. On average, hiring a professional technician can range from $150 to $300, taking into account both parts and labor. Conversely, if you’re able to successfully undertake a DIY repair, costs can be reduced to the price of the igniter itself, typically around $20 to $40, depending on the oven model. However, if the repair is attempted incorrectly, the costs can quickly escalate due to additional repairs and part replacements triggered by amateur errors.
Therefore, it is crucial to weigh the potential savings against the risk of damage. For those not confident with electrical components and gas appliances, opting for a professional not only ensures the job is done correctly but can extend the appliance's lifespan, potentially saving money in the long run. Moreover, professionals typically offer service guarantees, providing peace of mind that any follow-up issues will be addressed.
To summarize, while DIY repairs might offer immediate cost relief and satisfaction, the complexity and potential risks involved with gas ovens often make hiring a professional the safer option for most. For best results, carefully evaluate your technical prowess against the job requirements and consider consulting with a professional if there’s any doubt.
Tips to Prevent Future Igniter Issues
Taking proactive steps can significantly extend the lifespan of your gas oven igniter, preventing inconvenient breakdowns and saving money on appliance repair in the long run. It's important to understand that igniters are hardworking components, dealing with intense heat and frequent use. To keep them functioning well, regular maintenance and some simple practices can go a long way. Begin by ensuring your oven is always clean; food particles and grease can not only impede performance but can also cause parts to wear faster. Safety first: Make sure you always turn off the gas and unplug the oven before starting any cleaning or maintenance.
An overlooked yet vital aspect is checking the oven's connection point to the gas supply. Loose or faulty connections can put extra strain on the igniter. Keeping these connections snug helps the igniter function without stress. Also, be attentive to any unusual noises or smells when the oven is in operation; these are often early signs of potential problems. Investigate these clues promptly. A stitch in time saves nine, as they say, and this rings true for oven maintenance.
Expert Tips for Maintaining Your Igniter
Routine checks every six months can reveal early signs of wear. If family life means heavy oven use, consider making this a quarterly task. Checking with a flashlight can work wonders. Ensure that dust and debris haven't settled which could interfere with the igniter's function. Over time, these particles can cause clogging and uneven gas flow, leading the appliance to work harder and reducing the lifespan of the igniter. Here’s a practical tip: Once a year, hiring a professional to perform a maintenance check can prevent future headaches. This service often includes cleaning the igniter, which may not be as easy to do thoroughly at home."Regular maintenance can increase an oven's life expectancy by up to five years," suggests John Kemp, an appliance expert with over two decades in the field.Now, let's talk about the wiring. With complex internal designs, sometimes igniter problems stem from loose or frayed wires. It's useful to inspect these connections periodically with a gentle hand to ensure everything is secure. Any broken wires will need to be replaced, as these are fundamental to the consistent operation of the igniter. Being cautious with temperatures is another subtle yet effective strategy. Extremely high heats can cause excess stress on the igniter, so use maximum heat settings sparingly.
Smart Spending on Parts
Investing in quality ignition parts, particularly when replacements are necessary, can prevent repeated visits from a repair technician. Off-brand parts might save money temporarily, but they tend to compromise longevity and performance. Choosing parts that come with a warranty provides an added layer of assurance. Consider options that have at least a twelve-month parts guarantee to secure your peace of mind and wallet.Taking care of your gas oven means less wear on the igniter replacement and can considerably delay the need for costly repairs. A sound strategy can make all the difference, impacting both the efficiency of your oven and the safety of your home. By following these simple yet effective tips, you're keeping your appliance in prime health and ensuring it serves you well for years to come.
Choosing the Right Parts and Tools
Embarking on the journey to repair your gas oven igniter is significantly easier when you have the right parts and tools at your disposal. This isn't just about having screwdrivers and pliers; it's about understanding the specific needs of your appliance model. Most gas ovens contain detailed manuals that list compatible parts, but if you've misplaced yours, don’t worry. Many manufacturers provide digital resources online, offering diagrams and part numbers to ensure you pick the right fit for your specific appliance.
One thing to bear in mind is that igniters, while seemingly simple, vary quite a bit between models and brands. For instance, you might need to decide between a flat or a round ceramic igniter, depending on the manufacturer. Ensuring compatibility is crucial because the wrong part can lead to more damage, costing you more in the long run. Appliance costs can balloon if incorrect parts wreak havoc on your oven's inner workings. Online parts suppliers typically have customer service lines that can guide you through identifying the correct part if you're unsure.
Essential Tools and Safety Measures
It's tempting to dive straight into the repair process, but before doing so, gather all necessary tools. You'll generally need a Phillips head screwdriver, a wrench set, and a multimeter to test the continuity of the igniter and other components if you suspect further issues. Safety is paramount, so always disconnect your oven from its power and gas supply before beginning any repairs. This step cannot be overstressed; it's the first line of defense against accidents. If you've never handled appliance repair, it might be worth watching a few tutorials or reading comprehensive guides.
"The right tool for the job is the difference between an easy fix and a frustrating, costly experience," advises appliance repair expert Jake Pillmore.
Some folks find that an organized workspace, with all tools within easy reach, reduces stress and facilitates a smoother repair. Labeling parts and their corresponding screws as you disassemble keeps things orderly. Remember that patience is key. If you're struggling with a step, take a breather instead of forcing parts to move. It's easier than it might seem at first glance. Embrace the experience as a learning opportunity rather than a tedious chore.
Availability of Igniter Parts
With the rise of ecommerce, finding an igniter isn’t as hard as it used to be. Multiple marketplaces offer next-day delivery, ensuring you aren’t stuck waiting for days. However, checking user reviews and vendor ratings can be instrumental in ensuring you're dealing with reputable sellers. Prices might vary, so it's often wise to compare a few options before purchasing. DIY oven fixes have become increasingly feasible with these resources. It's vital to remember that cheap might not always mean cost-effective if the product isn't durable.
In case you're curious about replacement part costs, they typically range from $20 to $50. Price fluctuations often depend on the brand and whether the part is OEM (Original Equipment Manufacturer) or an aftermarket alternative. Original parts guarantee fit and function but may come at a higher price point. Aftermarket options might save some money but can sometimes lack the same build quality. Using OEM parts is usually recommended for peace of mind.