Cookers don’t just “blow up” out of nowhere. They burst when pressure has nowhere to go or when a safety part fails at the worst moment. I’ve been in a Perth kitchen when a foamy soup clogged a vent-scary hiss, lid rattling, starchy spray-but it didn’t turn into a disaster because the safety gear did its job. This guide trims out the myths and gives you the real causes, the red flags, and the fixes you can actually use today.
TL;DR
- Most bursts come from a blocked vent, overfilling, thick foamy foods, or a worn gasket that can’t seal.
- Safety valves and lid locks are your last line of defence; if they’re damaged or tampered with, risk goes up fast.
- Fill to 1/2 for beans/rice and 2/3 for most other foods; keep vents clear; replace gaskets yearly or when cracked.
- If pressure climbs or steam jets from the rim: kill the heat, step back, and let it depressurise on its own.
- Check ACCC Product Safety Australia for recalls; retire warped pots or faulty lid locks instead of gambling.
What actually makes a cooker burst?
Short answer: trapped pressure. A domestic pressure cooker builds steam to cook fast. It holds that pressure with a lid seal (gasket), then controls it with a primary vent/weight and a backup safety valve. If steam can’t escape the normal way-and the backup fails or is compromised-pressure climbs. Metal bends, gaskets spit, and in worst cases, the lid can blow off. That rare event is the classic pressure cooker explosion people fear.
Here’s what usually sets that chain reaction in motion, based on real faults I see and what manufacturers warn about in their manuals:
- Blocked vent or pressure regulator. Starch, foam, seeds, or dried sauce can plug the vent. No venting = pressure climb.
- Overfilling. If you exceed 2/3 full (or 1/2 for foamy foods like beans/rice), liquid can surge into the vent and block it.
- Foamy, thick, or splattery foods. Oats, lentils, chickpeas, pasta, rice, and thick tomato sauce can froth and clog vents.
- Worn, cracked, or wrong-size gasket. Old silicone or rubber hardens, flattens, or cracks, causing poor sealing or weird leak paths.
- Damaged lid-lock mechanism. If the lock pin sticks or the interlock is faulty, the lid can be opened while pressurised or fail to lock properly.
- Safety valve compromised. Corroded, gunked-up, missing, or replaced with a non-genuine part-this removes the last safety layer.
- Too much heat for too long. Full blast after reaching pressure overwhelms venting capacity and scorches food (which then clogs vents).
- Warped pot rim or lid. A drop on the floor, old soft aluminium, or prying the lid can deform the seal line.
- Counterfeit or wrong spare parts. Non-genuine gaskets and valves may not fit or blow at the right pressure.
- Electric cooker sensor faults. If temperature/pressure sensors read wrong, the unit may overshoot before it trips a fault.
- Misuse with oil-heavy deep frying. Hot oil behaves differently and can spike temperatures beyond safe control.
A quick side note for anyone using “cooker” to mean a gas oven/stove: a “burst” there is usually a gas buildup ignited by a spark-often from delayed ignition or a leak. If you ever smell gas, shut off the gas supply, open windows, avoid flames or switches, and contact a licensed gasfitter. In Australia, gas work must follow AS/NZS 5601.1 Gas Installations. Don’t DIY gas.
| Cause | What’s happening inside | Risk level | Quick fix / Prevention |
|---|---|---|---|
| Blocked vent/regulator | Steam can’t escape at the set rate; pressure rises fast | High | Disassemble and clean after each use; avoid foamy foods or use trivet |
| Overfilling | Liquid surges into vent and clogs it with food | High | Max 2/3 full; 1/2 for beans, grains, and frothy foods |
| Worn gasket | Seal leaks or fails; irregular venting and hot spray | Medium-High | Inspect every month; replace annually or at first sign of flattening/cracks |
| Faulty lid lock | Lid can open under pressure or fails to lock | High | Test the pin moves freely; replace lock parts; don’t bypass interlocks |
| Safety valve compromised | Backup fails to vent overpressure | Very High | Use only genuine valves; keep passage clean; never plug or glue it |
| Thick/foamy foods | Foam carries solids into vent; temperature hotspots | Medium-High | Use oil sparingly; add foamy items last; natural release; don’t thicken until after cooking |
| Too much heat | Overshoots set pressure; scorches food; runaway foaming | Medium | Reduce heat once pressure is reached; steady gentle jiggle is enough |
| Warped lid/rim | Uneven sealing; vents from rim; sudden seal failure | Medium | Check for rocking lid; replace pot/lid if warped |
| Counterfeit spares | Wrong blow-off point; poor fit | High | Buy parts from the maker or authorised sellers |
| Electric sensor fault | Controller doesn’t stop the heat in time | Medium-High | Update firmware if available; stop using if it errors under pressure; contact support or replace |
Spot the danger signs before anything bursts
The best time to avoid a mess is before you turn on the heat. These are the simple checks I run, and they’ve saved me more than once.
Pre-cook checks (2 minutes):
- Gasket check: Run your fingers around the seal. If it’s hard, cracked, sticky, or flattened, replace it. If it falls out easily, it may be stretched or the groove is greasy.
- Vent clear test: Look through the vent or regulator hole; you should see daylight. Poke gently with a wooden toothpick if you must. No metal picks.
- Safety valve inspection: The plug/pin should move or appear clean. Any crust, corrosion, or wobble is a no-go until cleaned or replaced.
- Lid lock: Press the pin; it should spring freely. On electrics, close the lid and see if the lock icon appears as usual.
- Fill level: Respect the lines. 2/3 for most foods; 1/2 for beans, rice, oats, pasta, and split peas.
- Liquid requirement: Most stovetops need ~250 ml minimum; electrics often need more. Check your manual’s minimum.
During cooking:
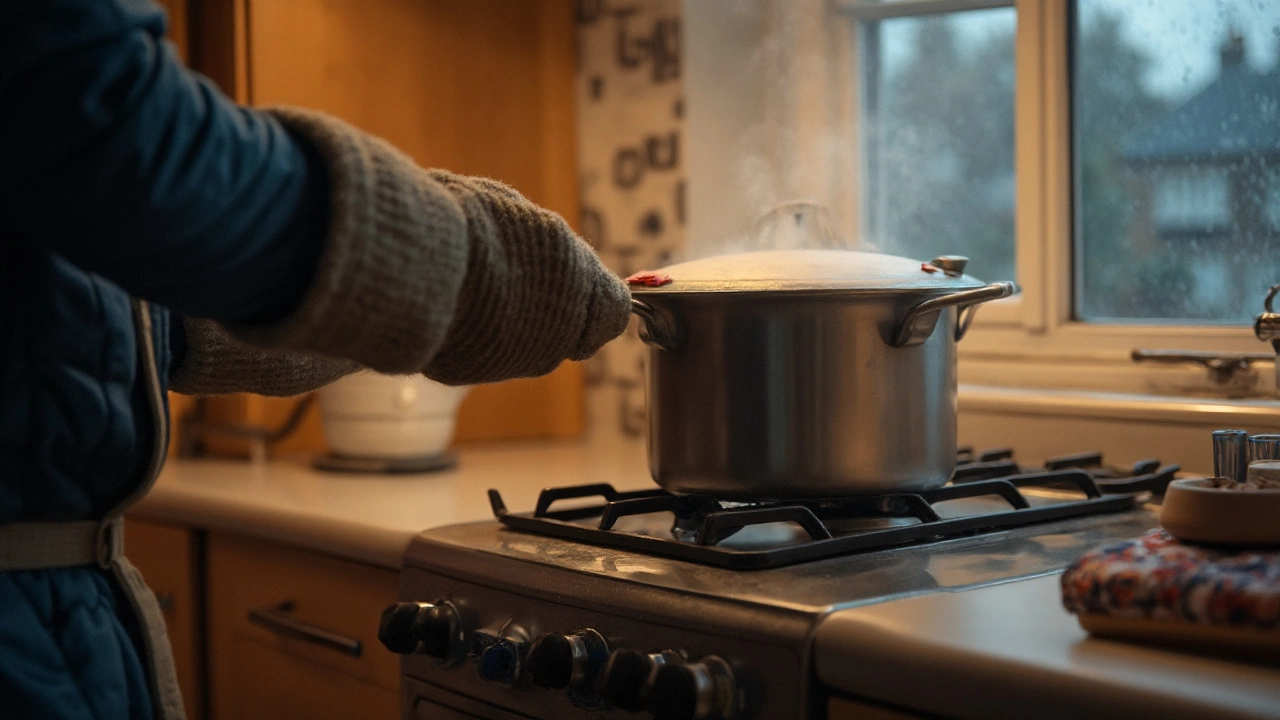
- Rim steam or spitting: Steam puffing from the sides means a poor seal or debris on the rim. Kill the heat and reassess.
- Wild, constant venting: If the regulator is screaming nonstop, you’re on too much heat. Reduce to a gentle, steady jiggle/hiss.
- Strange smells (burning or acrid starch): That’s scorching-food could be clogging the vent next. Lower heat and plan a careful stop.
- Slow to reach pressure: Could be too little liquid, a leaking seal, or a faulty element. Don’t ignore it.
After cooking:
- Residue in the vent/regulator: Clean immediately so it doesn’t harden.
- Brown ring pattern on the bottom: You ran too hot; that’s how foam happens next time.
- Gasket with glued-on starch: Wash with warm soapy water; if it stays tacky or smells, replace it.
Five-second checklist: Vent clear? Gasket supple? Lock pin free? Fill under the line? Enough liquid? If any “no,” don’t start.

Cooker-safe habits that prevent bursts
Once you know the patterns, safe pressure cooking becomes muscle memory. Here’s the playbook I stick to at home.
- Prep the vent path. Keep the vent and regulator clean and assembled right. If your model has a little cap or weight, seat it fully and the right way up.
- Mind the fill lines. 2/3 for most stews and stocks. 1/2 for beans, lentils, chickpeas, rice, pasta, oats, and anything foamy.
- Use a trivet or steamer basket. Lifts food off the base so it doesn’t scorch and surge. I use this for beans and thick sauces every time.
- Liquid first, thickener later. Don’t pressure cook with loads of roux, cornflour, or cheese. Thicken after you release pressure.
- Bring to pressure, then lower heat. On a stovetop, I drop from high to low-medium the moment the regulator starts moving. The goal is a gentle tick, not a rocket engine.
- Choose the right release. For foamy foods, use natural release (let it sit) for 10-20 minutes. For clear soups or meats, quick release is fine if your manual allows it.
- Never force the lid. If it feels stuck, it’s still pressurised. Wait until the lock pin drops on electrics or the pressure indicator shows zero.
- Replace wear parts on a schedule. Gaskets typically last 12-24 months depending on use; valves and locks last longer but still need inspection.
- No deep frying inside. Use a pan, not a pressure cooker, for frying. Hot oil plus enclosed pressure is a gamble.
- Stick to genuine parts. Pressure-rated bits are calibrated. Off-brand copies can blow too late-or too early.
Rules of thumb I trust:
- Operating pressure: Most stovetop models run near 70-100 kPa (10-15 psi) above ambient. If yours screams, you’re too hot.
- Water minimum: Never go under your manual’s minimum liquid or you’ll scorch and clog.
- One-variable changes: If you tweak a recipe (more beans, different pot), adjust only one thing at a time so you can spot what caused excess foam.
Electric pressure cookers add layers of safety (sensors, auto shutoff), but they’re not magic. If a recipe causes foaming, the vent can still clog. Treat electrics with the same respect-and keep that vent path spotless.
If pressure’s climbing or something feels wrong-do this
When in doubt, slow everything down. Speed is the enemy when pressure is misbehaving.
- Kill the heat immediately. Stovetop: turn the burner off and, if safe, move the pot off the hot element. Electric: hit cancel.
- Step back and wait. Give it a minute to settle. Don’t yank the regulator or pry the lid.
- Let it depressurise naturally. For foamy situations, a quick release can turn vents into geysers. Wait until indicators drop.
- If safe and allowed by your manual: For stovetops only, you can cool the pot base with a damp towel or set it on a cool trivet to help pressure fall. Don’t douse with water unless your manual says it’s okay.
- Inspect before re-pressurising. Open the lid away from you. Clear the vent, check the gasket, and stir to disperse foam. Add liquid if it looks thick.
If the cooker sprays from the rim: That’s a failed seal or debris on the rim. Turn off heat, keep distance, and let it finish venting. After it’s safe, clean the rim and gasket, and consider a new gasket.
If you smell gas from a “cooker” (stove/oven): Shut off the gas supply, open windows, avoid flames and switches, and call a licensed gasfitter once the area is aired. In Australia, gas work is licensed and must meet AS/NZS 5601.1. Don’t try to relight anything until it’s checked.
If someone gets burned: Australian first aid guidance recommends cooling the burn under cool running water for 20 minutes. Remove rings or tight clothing near the burn. Don’t use ice, creams, or butter. Seek medical advice for large, deep, or facial burns.
My own near-miss at home was a lentil soup day. I got distracted, left the heat a touch high, and the regulator was chattering like mad. I cut the heat, waited, and found a starchy plug in the vent cap. Five minutes and a toothpick later, crisis averted-and a new habit born: natural release for foamy foods, every time. Liana still reminds me with a look if I reach for quick release on beans.

Recalls, repairs, and when to retire your cooker (plus a quick FAQ)
Pressure cookers do a ton of work for a simple pot and lid. They’re safe when the safety stack is intact. They’re risky when you ignore damage or swap in dodgy parts.
When to stop using and replace:
- Warped lid or pot rim. If the lid rocks or the rim isn’t flat, it won’t seal right.
- Lid lock that sticks. Any sticking or false “locked” feeling is a red flag.
- Safety valve damage. Corrosion, cracks, or unknown blow-off point-don’t risk it.
- Nonstick peeling into vents. Flakes can lodge in the vent system.
- Unknown model or missing parts. If you can’t get genuine spares or a manual, retire it.
Recalls and compliance (Australia): Check ACCC Product Safety Australia for pressure cooker recalls by brand and model. Recalls often involve lid-lock defects or valves that don’t open soon enough. If you own a gas cooker or gas hob, installation and repair must meet AS/NZS 5601.1, and work must be done by a licensed gasfitter. Keep your model number and batch/serial handy.
Service life tips:
- Gaskets: Replace every 12-24 months or at first signs of wear. Heat, detergents, and Perth’s summer heat can age rubber fast.
- Valves and regulators: Inspect every few months; replace if crusted or if cleaning doesn’t restore smooth movement.
- Electric units: Electronics usually last 5-10 years depending on use and care. If sensors misread or you see repeated overheat errors, retire it.
Quick FAQ
- Are modern pressure cookers safe? Yes-multiple safety systems work together. Bursts are rare and almost always linked to misuse, damage, or tampering.
- Can a brand new cooker burst? It’s unlikely. Faulty units do slip through sometimes, which is why recalls exist. Always clean new parts of factory oils and do a water test first.
- Is it okay to block the vent to keep more pressure? Never. That defeats the main safety control and can lead to catastrophic failure.
- Do beans and rice cause bursts? They can if you overfill or quick-release. Keep to 1/2 full and let pressure drop naturally.
- Stovetop vs electric-what’s safer? Electrics add sensors and interlocks, but both are safe if used right. Either one can get into trouble with thick, foamy foods.
- Does altitude matter? At high altitude, water boils lower, so cook times change. In Perth (near sea level), you’re at standard settings.
- My gas oven “popped” once-was that a burst? Likely delayed ignition. Have a licensed tech check burners, ignition, and seals. Don’t ignore gas smells.
Next steps if you’re worried today:
- Run a 5-minute water-only test. Watch how it reaches pressure and vents. Any odd behaviour? Stop and inspect.
- Replace the gasket if it’s older than a year or looks tired. Cheap part, big peace of mind.
- Deep-clean the vent path and safety valve. Make this a habit after foamy meals.
- Check for recalls with ACCC Product Safety Australia using your brand and model.
- If you use gas and smell gas, pause cooking and get a licensed gasfitter to inspect before relighting.
Cookers don’t burst by fate. They burst when small problems pile up in the wrong order. Keep the vent clear, mind the fill, respect foam, and refresh the parts that age. You’ll get the speed you want without the drama.