Extractor Fan Airflow Calculator
Calculate Your Ventilation Needs
Determine the correct airflow capacity (L/s) for your new extractor fan based on room size and type
Recommended Airflow Rate
L/s
Replacing an extractor fan doesn’t have to be a nightmare. If you’ve ever stared at a noisy, rattling fan in your bathroom or kitchen and wondered if you could fix it yourself, the answer is yes-most of the time. You don’t need to be a licensed electrician or have a toolbox full of fancy tools. With a little care and the right steps, you can swap out a broken extractor fan in under two hours. And you’ll save yourself a service call that could cost $150 or more.
Why Replace an Extractor Fan?
| Sign | What It Means |
|---|---|
| Loud grinding or buzzing noise | Motor bearings are worn out. Not fixable without replacing the whole unit. |
| Fan won’t turn on at all | Could be a blown capacitor, faulty switch, or dead motor. Often cheaper to replace than repair. |
| Condensation builds up on walls or windows | Fan isn’t moving enough air. Newer models are 30-50% more efficient. |
| Dust and grease buildup around the grille | Filter is clogged or fan is underpowered. Cleaning helps, but if it’s over 10 years old, replacement is smarter. |
| Smells linger after cooking or showering | Extraction rate is too low. Modern fans move 70-100 litres per second; old ones often do 30. |
Most extractor fans last 8 to 12 years. If yours is older than that, it’s not just noisy-it’s inefficient. Replacing it isn’t just about comfort. It’s about stopping mold, protecting your walls, and reducing humidity that can rot timber frames over time. In Perth’s humid summers, a working extractor fan isn’t a luxury. It’s a necessity.
What Tools Do You Need?
You don’t need to buy anything special. Here’s what’s actually in your toolbox:
- Screwdriver (flathead and Phillips)
- Wire strippers (or a sharp knife if you’re careful)
- Voltage tester (non-contact is best-under $20 at Bunnings)
- Measuring tape
- Masking tape and a marker
- Sturdy step ladder
- Work gloves and safety glasses
That’s it. No power tools, no soldering iron, no special training. The only thing you might not have is a voltage tester-and that’s the one item you shouldn’t skip.
Step-by-Step: How to Replace an Extractor Fan
Follow these steps carefully. Don’t rush. Electricity and water don’t mix, and mistakes here can be dangerous.
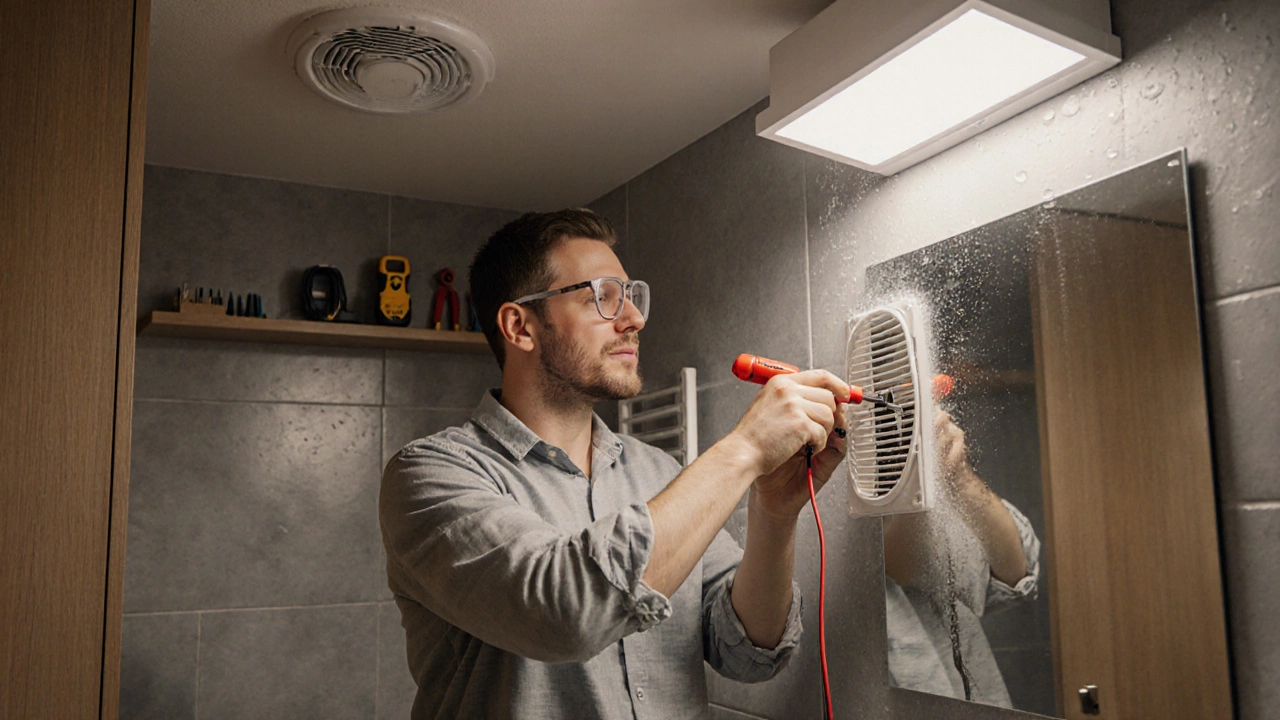
- Turn off the power. Go to your switchboard and flip the breaker for the bathroom or kitchen. Then use your voltage tester on the wires inside the fan housing to confirm there’s no current. Test it twice. Don’t trust the switch alone.
- Remove the grille. Most grilles snap off or are held by two or four screws. Take them off and set them aside. If it’s stuck, gently pry with a flathead screwdriver.
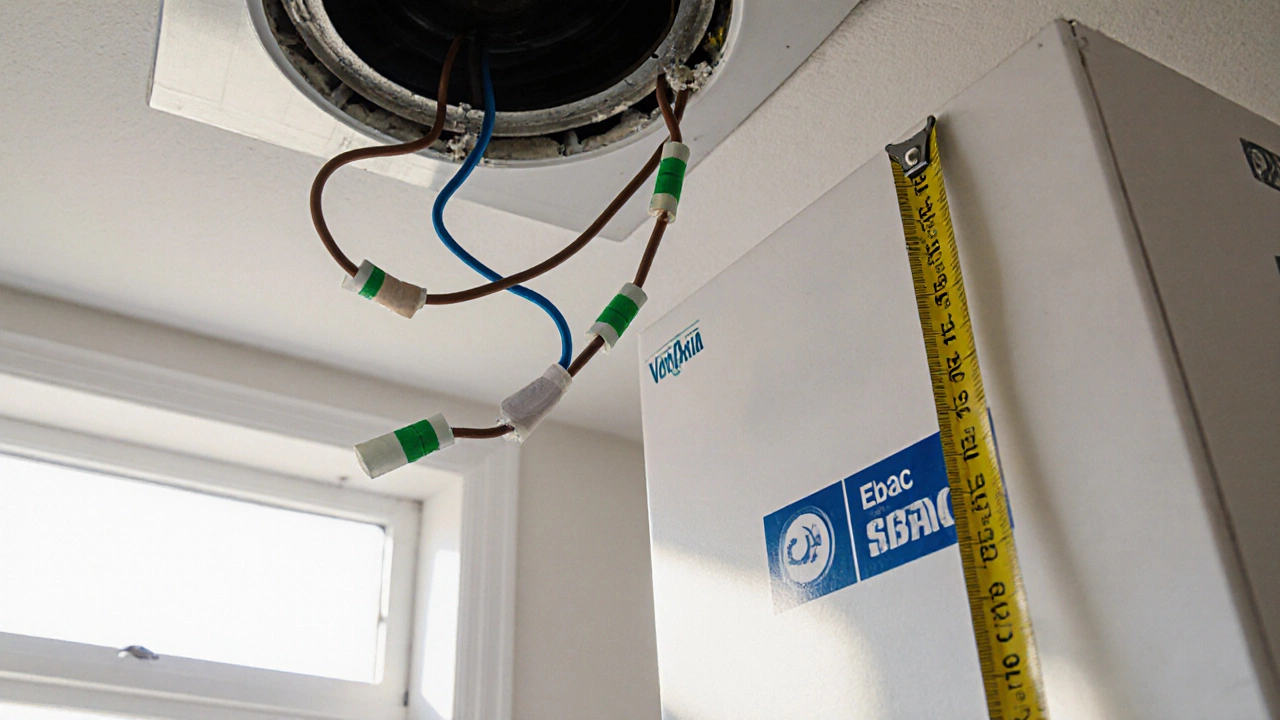
- Unplug the wires. You’ll see two or three wires: live (brown), neutral (blue), and earth (green/yellow). Take a photo with your phone before disconnecting. Then twist off the wire nuts or unclip the connectors. Tape the ends with masking tape so they don’t touch anything.
- Remove the old fan unit. There are usually two or three screws holding the fan housing to the ceiling or wall. Unscrew them and carefully lower the unit. Watch for ducting-don’t pull hard. If the duct is glued or nailed, you might need to cut it with a utility knife.
- Measure the opening. Use your tape to note the width, height, and depth of the hole. Most standard extractor fans are 150mm to 200mm in diameter. Write it down. You’ll need this when buying the new one.
- Buy a replacement. Match the size, voltage (240V in Australia), and airflow (measured in L/s). Look for a model with an integrated timer or humidity sensor. Brands like Vent-Axia, Ebac, and Manrose are reliable and easy to install. Avoid the cheapest options-they’re noisier and break faster.
- Install the new fan. Slide the new unit into the hole. Secure it with the screws provided. If your old ducting fits, reuse it. If not, connect the new one with a flexible aluminum duct and clamp it tightly.
- Reconnect the wires. Match the colors: brown to brown, blue to blue, green/yellow to earth. Twist wire nuts on securely. Tuck the wires neatly into the housing.
- Reattach the grille. Snap or screw it back in place. Make sure it’s flush and secure.
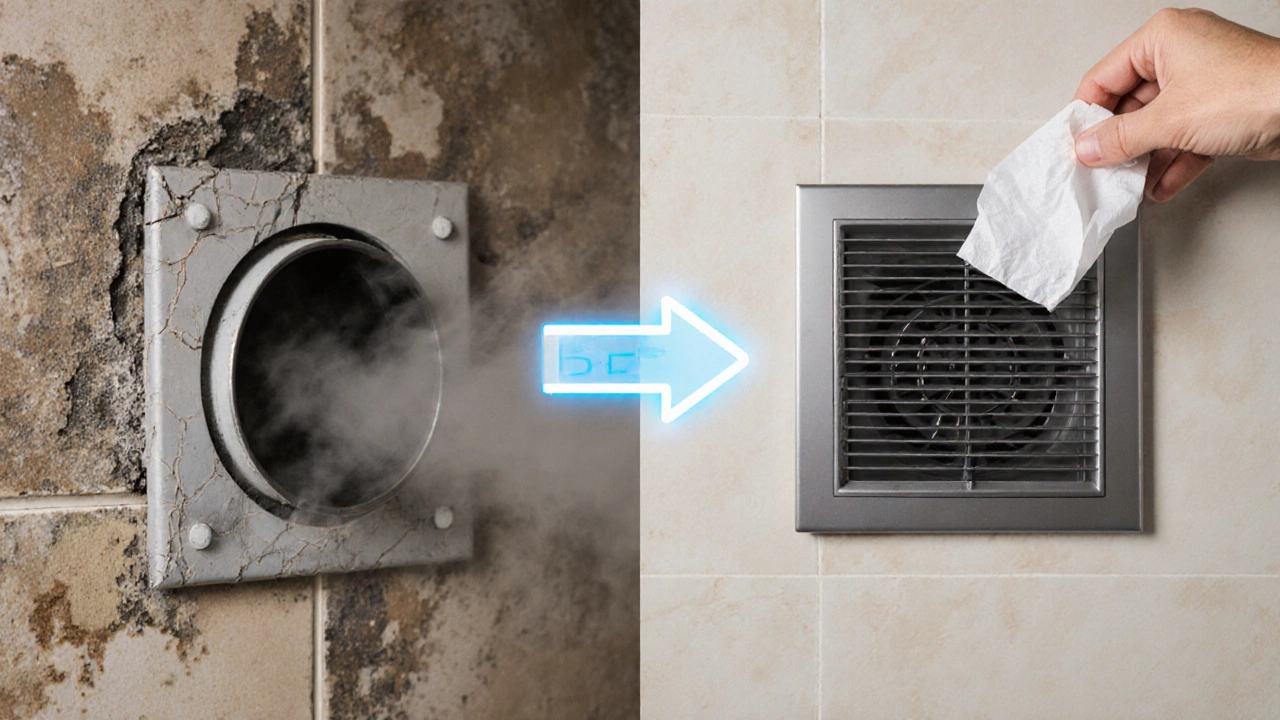
- Turn the power back on. Flip the breaker. Test the fan. Listen for smooth operation. Check airflow by holding a tissue near the grille-it should pull firmly.
What Can Go Wrong?
Most people get through this without issues. But here are the three most common mistakes-and how to avoid them.
- Forgetting to turn off the power. This isn’t a drill. One slip and you’re in serious danger. Always test the wires.
- Using the wrong size fan. If the hole is 150mm and you buy a 200mm fan, it won’t fit. Measure twice. Buy once.
- Loose ducting. If the duct isn’t sealed, moist air leaks into your ceiling cavity. That’s how mold starts. Use foil tape (not duct tape) to seal joints.
Also, don’t try to install a fan with a built-in light unless you’re replacing one that already had one. Wiring a light-fan combo without experience can be messy.
Should You Do It Yourself or Call a Pro?
If you’re comfortable with basic tools and have turned off a circuit breaker before, you can do this. Most homeowners in Perth replace their own extractor fans without issue.
Call a professional if:
- You’re unsure about the wiring or the switchboard
- The fan is in a ceiling with no access panel
- You suspect asbestos insulation (homes built before 1990)
- You’re replacing a fan in a commercial kitchen or multi-unit building
For most single-family homes, DIY is safe, faster, and cheaper. The average service call for this job in Perth costs $180-$250. A new fan costs $60-$150. You do the math.
What to Look for in a New Extractor Fan
Not all fans are created equal. Here’s what actually matters:
- Airflow (L/s): Bathroom: 15-25 L/s. Kitchen: 30-50 L/s. Higher is better if your duct is long or has bends.
- Noise level: Look for under 1.0 sone. Anything above 1.5 sounds like a vacuum cleaner.
- Timer or humidity sensor: A 10-15 minute timer lets the fan run after you leave the room. A humidity sensor turns it on automatically when steam rises.
- Energy rating: Choose 4-star or higher. You’ll save on electricity over time.
- Warranty: 5+ years is standard for quality brands. Avoid no-name units.
Brands like Vent-Axia and Ebac are widely available in Australia. You can find them at Bunnings, Mitre 10, or online through suppliers like Airflow Solutions.
How Long Does It Take?
If you’ve done it before? 45 minutes. First time? Plan for 1.5 to 2 hours. That includes shopping for the new fan and cleaning up. The actual installation is usually under an hour once you’ve got the old one out.
Pro tip: Do it on a weekend morning. You’ll have plenty of light, and if you run into trouble, you’ve got time to fix it-or call someone before Monday.
What to Do If It Still Doesn’t Work
You installed everything right, turned the power back on, and the fan still won’t run? Here’s what to check:
- Is the circuit breaker still on? Sometimes it trips during installation.
- Are the wires connected correctly? Double-check the colors.
- Is the timer or sensor set to off? Some models have a manual override switch.
- Is the duct blocked? A bird’s nest or kinked hose can stop airflow and cause the fan to stall.
If you’ve checked all that and it still doesn’t work, the fan unit might be faulty. Most come with a warranty. Contact the supplier for a replacement.
Can I replace an extractor fan without access to the ceiling?
Yes, if the fan is mounted in a wall. Most bathroom extractor fans are wall-mounted and don’t require ceiling access. You only need access to the back of the fan unit from inside the room. Ceiling-mounted fans require either an attic space or removal of ceiling tiles. If you don’t have access, you’ll need to cut a small hole to route the ducting, which is more complex. For most standard installations, wall-mounted fans are easier to replace.
Do I need a licensed electrician to replace an extractor fan?
In Australia, you don’t need a licensed electrician to replace an extractor fan if you’re swapping it for an identical model and not modifying the wiring. But if you’re adding a new circuit, changing the switch, or installing a fan with a light, you must use a licensed professional. Always check your local regulations-some councils require certification for bathroom ventilation upgrades.
How much does a new extractor fan cost?
Basic models start at $60. Mid-range fans with timers and low noise cost $100-$150. High-end models with humidity sensors and smart controls go up to $250. You’ll also need ducting and fittings-around $20-$40 extra. Most people spend between $80 and $180 total for a quality replacement.
Why is my new extractor fan so noisy?
Most noise comes from poor installation. Check that the fan is securely mounted and not vibrating against the ceiling or wall. Make sure the ducting isn’t kinked or crushed. Also, ensure the grille is properly seated. If the fan itself is loud even with perfect installation, you likely bought a low-quality unit. Look for a noise rating under 1.0 sone for quiet operation.
How often should I clean my extractor fan?
Clean the grille every 3 months-just wipe it with a damp cloth. If you have a filter, wash or replace it every 6 months. Once a year, turn off the power and vacuum out the fan blades and housing. Grease buildup in kitchen fans can reduce airflow by up to 40%. Regular cleaning keeps your fan quiet and efficient.
Final Thoughts
Replacing an extractor fan isn’t just about fixing a broken appliance. It’s about protecting your home from moisture damage, preventing mold, and making your space more comfortable. The job is simple enough for most homeowners. You don’t need to be an expert. You just need to be careful, measure twice, and turn off the power. The savings, the peace of mind, and the quiet bathroom afterward? That’s worth the effort.