
Electric hobs are fixtures in many kitchens, prized for their sleek design and ease of use. However, mishaps such as burnt surfaces can disrupt their efficiency and appearance. If you've discovered a burnt hob and are wondering how to tackle the problem, you're in the right place.
This guide is crafted for those keen on restoring their cooktop without jumping to costly replacements. With clear and practical steps, let's navigate through the processes of identifying damage, applying quick fixes, and knowing when it's time to seek professional help. Equip yourself with these maintenance tips to prevent future burns and keep your cooking space in prime condition.
- Understanding the Burnt Electric Hob
- Safety Precautions Before Starting Repairs
- Analyzing the Damage
- DIY Repair Techniques
- When to Call a Professional
- Preventative Measures to Avoid Future Burns
Understanding the Burnt Electric Hob
In the heart of every modern kitchen, the electric hob is an unsung hero, transforming raw ingredients into delightful meals. But like any well-loved appliance, it's not immune to accidents. A common issue many face is the dreaded burn mark. Burnt surfaces not only disrupt the aesthetic of your hob but can also interfere with its performance. Understanding why these burns occur is the first step towards a successful repair. The causes can range from everyday spills of sugary substances that caramelize on exposure to heat, to prolonged use of pots and pans with uneven bases that concentrate heat on specific spots, effectively scorching the hob.
Delving into the anatomy of electric hobs, it's interesting to note that they are designed with heat-resistant glass or ceramic tops. However, no matter how resistant an appliance is marketed to be, repeated abuse or neglect can take its toll. Grime builds up over time, and small spills impregnated with salt or oils can slowly etch into the surface. In some cases, owners might even find themselves inadvertently using abrasive cleaners or sharp tools that leave micro-scratches. These scratches, although tiny, provide more surface area for grime to cling to, hastening the damage process.
According to a study by the Home Appliance Maintenance Association, "Regular maintenance and correct usage extend the appliance's life by an average of 30%."This statistic underscores the importance of understanding not just the structure but also proper care techniques. Equipped with this knowledge, you're not only repairing but taking steps to preserve your electric hob for years to come. Those who frequently cook at high temperatures might also notice that certain types of cookware can exacerbate the problem. Cast iron and copper bottoms, for instance, are known culprits when it comes to excessive heat retention and can cause more significant burns.
Recognizing these factors not only illuminates why your hob is in its current state but also guides you in choosing effective cleaning and repair methods. By appreciating the interaction between your hob's surface and the cookware materials you prefer, you can tailor your cooking habits to protect against future damage. Many users find that a modest investment in high-quality, flat-bottomed cookware made explicitly for electric hobs can prevent many of these issues before they arise. This proactive measure can often save you from having to tackle a repair job altogether.
Safety Precautions Before Starting Repairs
Before diving into the process of fixing your burnt electric hob, ensuring your safety is paramount. Working with electric appliances comes with inherent risks if not handled properly. The very first thing to do is to disconnect the appliance from the power source. This is vital. Many accidents occur due to negligence in isolating the power, leading to electric shocks. Always double-check the plug and ensure it's unplugged correctly. If your hob is hardwired, shut off the circuit breaker that powers it. This simple action can prevent unfortunate incidents.
Next, let's focus on the workspace. Make sure your kitchen is well-ventilated. Open windows and doors, if possible, to allow fresh air to circulate. This helps in preventing any buildup of fumes, especially if cleaning agents are involved in the process. It's also important to keep children and pets away from the area. Their curiosity can inadvertently lead to accidents or disrupt your attention from the task at hand. Another aspect often overlooked is attire. Wear non-conductive gloves and shoes with rubber soles. This might sound excessive, but it's a safeguard against unforeseen electrical mishaps.
“Safety isn't expensive, it's priceless.” – Author Unknown
Before you begin the actual repair, gather all your tools and materials. Having everything within reach minimizes distractions and ensures a smoother repair process. Tools like screwdrivers, cleaning agents, and brushes are essential for the job. Depending on the extent of the damage, you might need some replacement parts, which should be compatible with your specific electric hob model. Not having the correct tools can lead to inadequate repairs or further damage. Materials should be checked for any warnings regarding use with electronic appliances.
Consider Professional Help
Understand your limitations. Not every issue with a burnt hob can or should be tackled independently. If you notice extensive damage, like melted components or persistent electrical issues, it might be wise to contact a professional. Attempting to repair complex issues without the necessary expertise can be counterproductive, leading to more costly repairs or replacements. Remember, some repairs may void warranties if not executed by certified technicians.
| Essential Tools | Purpose |
|---|---|
| Screwdriver | For removing panels and securing parts |
| Multimeter | To safely check electrical circuits |
| Cleaning Agent | For removing burnt marks and residue |
| Protective Gloves | To prevent electric shock |
In conclusion, while repairing a burnt electric hob without expertise might be enticing to save costs, the importance of handling this task safely cannot be overstated. With the right precautions and tools, you can confidently address minor issues and maintain your electric hob’s efficiency. Safety should always be at the forefront of any repair endeavor, ensuring not only the longevity of your appliance but also your personal well-being.
Analyzing the Damage
Embarking on the journey to repair a burnt electric hob starts with a thorough analysis of the damage. Identifying the root cause is vital to determine the appropriate repair methods. The hob surface might show visible scorch marks or discoloration, which often result from excessive heat or spillage from cooked food. In many cases, these marks are merely superficial and can be treated with particular cleaning techniques. However, sometimes the damage can be more severe, affecting the underlying heating components, which demands a closer inspection.
To begin, carefully examine the area for any signs of cracking or warping. These signs suggest that the damage isn't just skin-deep and might affect the hob's performance. Using a flashlight, inspect to detect any small fissures that might not be obvious at first glance. It's essential to ensure that the hob's outer coating remains intact as this protective layer helps in uniform heat distribution across the appliance. Once you have a clear understanding of the damage extent, note whether it affects the hob's functionality or is merely aesthetic. Often, burnt odors can linger even after the source of the burn is removed, indicating deeper unhygienic zones that need addressing.
Observational care doesn't stop at the surface. The underlying circuitry and wiring play a critical role in determining the hob's safety and functionality. Look for any signs of damage such as burnt wires, which can lead to bigger electrical issues. The vibrant connection between the hob's controls and its heating elements must remain sound to ensure safe operation. If you're unsure about the state of the internal components, seeking professional advice might be the best course of action. According to appliance expert John Smith, "Even minor electrical faults can have significant implications, so erring on the side of caution is always advisable."
For those inclined towards a more technical approach, consider using a multimeter to check the hob's electrical continuity. This tool can help determine if there are breaks or faults in the internal wiring, which can stem from overheating or poor original installation. Recognize that, though it might seem daunting, this step can prevent future complications and ensure that the hob's heat settings maintain their efficiency. Knowledge is power, and understanding the depth of the damage places you in a better position to decide whether the fix is a DIY project or a job for a professional technician. Don’t shy away from documenting any unusual findings; photos and notes can be invaluable references if you need expert help down the line.
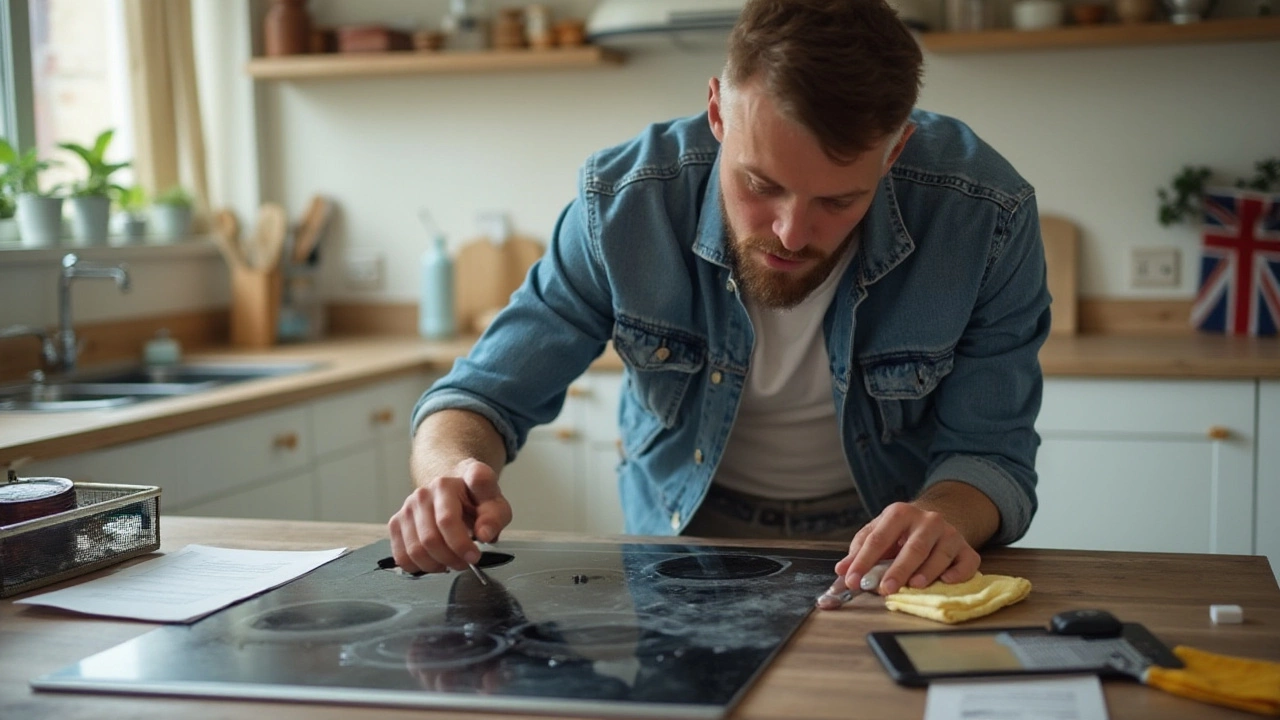
DIY Repair Techniques
Tackling a burnt hob doesn't have to involve professional intervention or hefty expense. With a little patience and the right approach, you can often restore your appliance to its near-original glory. The key is understanding the burn's severity and applying targeted techniques suited for each scenario. There's no one-size-fits-all in hob repair, much like there isn't in life. It's about assessing the symptoms and acting accordingly, ensuring that your hob continues to function effectively.
Before diving into repairs, it's crucial to prepare. Gather safety gloves, a selection of cleaning agents, and some basic tools. Your first step is assessing the type of burn damage. Common causes include overflowing liquids, burnt food residue, or stubborn grease marks. Identifying these will help in selecting the right treatment method. With safety as a priority, always disconnect the hob from its power source—you don't want this endeavor to turn into an electrifying experience! Once it's safe, tackle visible residues using a scraper designed for glass cooktops. This ensures you address surface-level issues without causing further scratches.
"Every kitchen mishap can be a learning opportunity if tackled with the right mindset and tools," says renowned kitchenware expert, Sarah Ashcroft.
For deeper burns that discolor or damage the surface, baking soda and vinegar act as a formidable duo. Make a paste by combining equal parts, and gently apply with a soft cloth, letting it sit for a few minutes before scrubbing. This natural solution is effective and environmentally friendly, ensuring your kitchen stays chemical-free. If there are deeper char marks left by utensils or pots, consider using a specialized ceramic hob cleaner; these are designed to handle stubborn marks without causing harm. An important tip— never use abrasive sponges or steel wool, as they can inflict permanent scratches on the hob's surface.
If discoloration persists, think about investing in a restoration kit. These kits typically include fine-grit sandpapers and are tailored for such purposes. They help in gently buffing away the damaged spots, followed by the application of a repair cream that matches the hob's natural finish. Completing this process requires patience and a delicate touch, but the result can be astonishing. It's clear that these tools can save you from having to invest in costly new appliances. Ensuring your hob remains functional and visually appealing is as much about care as it is about technique.
For those curious about statistics, consider this: studies have shown that households opting for DIY repair tactics save an average of 30% compared to those immediately turning to professional services. These savings manifest not just in monetary terms but also in time, especially when considering the coordination involved in professional appointments. The convenience of self-repairing cannot be understated—it not only preserves your wallet but also empowers you with a sense of accomplishment. Trust in your ability to repair, and you'll often find your hob shining as wonderfully as it did on the day you first cooked with it.

When to Call a Professional
Sometimes, despite our best DIY efforts, an electric hob's issues exceed our personal expertise. Knowing when to dial up a professional is just as crucial as attempting fixes on our own. Professionals bring specialized skills and equipment that ensure the job not only gets done but gets done safely and effectively. An essential guideline is if the hob remains unresponsive, sparks, smokes, or shows persistent problems despite following standard troubleshooting steps. These can be signs of complex issues within the electrical system, which require more than just superficial fixes and need a professional's touch.
When a hob shows signs of electrical malfunction such as tripping circuit breakers repeatedly or inconsistent power levels, there might be deep-rooted wiring faults. Handling live electrical components without the right tools and protective measures can risk damaging other appliances or causing personal injury. Electricians can check your system with diagnostic tools to ensure no hidden dangers are lurking. While some DIY enthusiasts find it a breeze to replace heating elements or sensors, professionals can guarantee these parts are compatible and installed perfectly—ensuring the hob's longevity.
For those still unsure about professional intervention, consider the cost-benefit analysis. At times, paying for expert service saves money in the long run, avoiding further damage that could lead to replacing the whole hob. If your appliance is under warranty, professional repair is often necessary to keep that warranty valid. Many warranties become void if personally tampered with, so checking those conditions is key. As the Australian Competition and Consumer Commission advises, "Understand your consumer rights" especially regarding warranties and services. Their advice reinforces the importance of consulting with skilled workers for potentially warranty-voiding repairs.
Let's not forget the benefits of professional peace of mind. Knowing the repair is done correctly allows you to focus on what electric hobs do best—effortless cooking. A professional can offer advice on maintaining the hob in prime condition, yielding long-term benefits. They often provide checklists or educational guides to avoid future mishaps, meaning that calling in the experts doesn't just remedy an immediate problem; it arms you with knowledge for preventing future ones. If your hob is experiencing frequent issues, it might be a sign of needing a full check-up; professionals can provide that overall health check.
Another thing to consider is if your electric hob is part of a smart home system. The intricacies of these setups sometimes require specialized know-how that extends beyond typical electrical work. Professionals stay up-to-date with the latest technologies, ensuring seamless integration of your hob within the broader system, which sometimes you cannot achieve by alone. Getting your hob back on track may just be a call away, and it's often the wisest course of action to prevent further headaches.
Preventative Measures to Avoid Future Burns
Preventing your electric hob from experiencing burns not only prolongs its life but also ensures that your kitchen runs smoothly and remains visually appealing. The first step to preventing burns is understanding the common causes. Typically, grime build-up, unattended hot surfaces, and heavy-duty pots that are left to boil dry are culprits that lead to the notorious black marks you're eager to avoid. It's crucial to get into the habit of cleaning your hob regularly with appropriate, non-abrasive cleaners that won't scratch or damage the surface. Consistent cleaning sessions help remove residue that could otherwise bake into tougher stains when the hob is turned on again.
Adopting proper cooking practices is another cornerstone method for keeping your beloved kitchen companion in top-notch condition. Always opt for pots and pans that are suited for your specific hob model to ensure they're not too heavy nor too large for a single burner. This practice not only ensures even heating but also reduces the risk of energy inefficiency. Avoid putting cold pots directly on fiery hot surfaces as this sudden temperature change can cause both to warp over time, leading to potential burning. Additionally, one should consider never leaving an active hob unattended. A watched hob ensures that spills or boil-overs can be handled immediately, rather than left to create stains or potential damage.
The finishing touches on effective prevention involve keeping your hob happy with regular maintenance checks. Sometimes these modern marvels need a little TLC; it's advisable to inspect your hob every few months for any signs of wear and tear that might need more attention. Listen for any unusual sounds or smells when your hob is in use. Changes in how your hob sounds or any funky odors might hint at underlying issues that could not only affect their functionality but might encourage unwanted burns or damage. Remember, an ounce of prevention is worth a pound of repair. Investing time in understanding and implementing these simple preventative measures can save you both time and money in the future.